Cork Borders

I decided I wanted to add borders around the bends to allow the outside car on a bend to slide like the inside car. It is also necessary on very tight inner curves so that the inner car does not drop off the inside. The borders must be at the same height as the track and they need to have a suitably grippy surface.

Selection of Scalextric borders

Scalextric do produce them and I do have some (see Track Sections), but I wanted more and did not want to buy new ones.

For some radii of curve I could use and existing border as a template. I have made a simple tool to help me make cardboard templates for the others. It ensures the pencil stays exactly the same distance from the track section used as a guide.

Drawing template with special tool
Wooden block, pencil and rubber bands

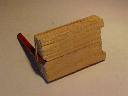
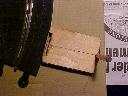
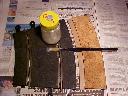
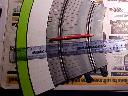
A rectangular notch is cut in one end and the pencil is held in a grove at the other end by some rubber bands.

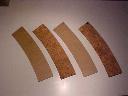
The template is used to mark out the cork tiles (intended for bathroom floors of notice boards).

Packet of cork tiles
Sheet of cork and chisel on wooden block

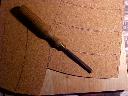
I found the easiest way to cut the 3.2mm thick cork is to use a narrow (about 0.5 inch or 12mm) wood working chisel. It is easier to than a craft knife or utility knife.

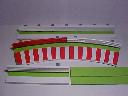
The cork in then glued to hardboard that has been cut to shape with a coping saw. The 'wood' is cleaned up with sandpaper first.

Bits of hardboard and cork cut to shape
Curve, cork, hardboard, glue and brush

The cork can be stuck down with watered down with PVA glue. I store my dilute glue in an old mustard jar and apply it with a brush, which I wash thoroughly after use. Line both bits up by pushing them against the side of a curve.

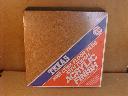
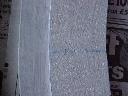
The border is then undercoated with Brilliant White Vinyl Matt paint. It can take a few applications as the cork absorbs the paint.

Cork after one coat of paint
Blue line bleeding through white paint

I learnt the hard way that you should not mark out the cork with a water soluble pen as it leaches through. The ink can be sealed with correction fluid if you accidentally use the wrong pen.

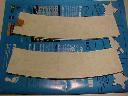
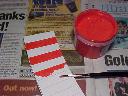
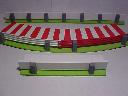
I have marked out a 'scrap' curve (it was already painted white by a previous owner) so that I can mark out the red stripes.

Marking out with red pencil
Picture not yet available

In real life the stripes are actually bumps or small steps to deter drivers from clipping curbs, but mainly on the inside. I have not modelled this feature as it would disadvantage one driver as unlike real life, slotcar drivers cannot select their position on the track.

The lines are painted on by hand using acrylic paint sold in tester pots.

Curved and straight borders with barriers, from behind

You can even add crash barriers, either curved or straight. The Scalextric barriers used had broken clips so they could not be used by clipping them onto the edge of a track section. The straight barriers are made from a wooden moulding from Wicks.

If you leave a gap between the border and the barrier, the outside car cannot gain an advantage by leaning against the barrier and going flat out. Flat curbs are white, rumble strips are red and white, and grass is green.

Curved and straight borders with barriers, from in front
Rover 3500 coming off edge of track after bend

I still need to make some run in and more importantly run out sections so that a car does not become stuck after sliding round a bend.

Back to Scenery Menu Return to the Top of the Page