Tools - Small
 |
A Parallel Marking Tool. Since the main beams going along the loft are not parallel, a triangle has to be cut from the edge of the floor boards so that they are flush. The next board is placed in position, but only one corner will be touching the beam. The other corner will be about 1 cm from the beam. |
The upside down pencil is placed against the beam and a cutting line is drawn down the side of the board, about 1cm from the beam. The board is then removed and the end sawn off. When board is then put into position, the end is flush with the beam. |
 |
 |
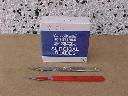
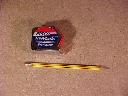
A Plane White Candle. It can be a tea light like the one shown, or a normal candle stick. I use it for two things. I rub it onto both sides of my saw blades reducing the friction between the sides of the blade and the edges of the wood being sawn. I also rub it onto the threads of a screw if I am going to screw it in by hand. This is meant to be especially important when using brass screws (which I don't) but still reduces friction with steel screws making them easier to screw in. |
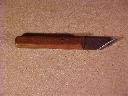
A Marking Knife to accurately mark out wood before sawing. A knife cut is more precise than a relatively thick pencil line. However for most of the loft conversion work this added accuracy is not needed. It is needed when doing other woodwork such as making a display cabinet. Note: the profile of the blade is not symmetrical so it can only be used one way round. A Stanley or utility knife can be used instead, but its blade is V shaped (symmetrical) is not quite as accurate, however you may already have a Stanley knife! |
 |
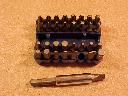 |
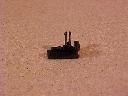
A Set of Screwdriver Bits for my battery-operated screwdriver. It came with a short, double ended screwdriver bit, but I needed something longer when attaching the metal brackets for the perpendicular battens to support the floor boards in the loft. The set is made up of a magnetic bit holder, shown at the bottom containing one bit, and 32 screwdriver bits of various profiles. It came as part of a screwdriver set from B&Q. As usual when I visited Wicks just around the corner, they had a different set that was cheaper. |
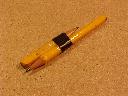
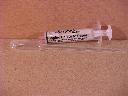
A Small Syringe and A Pipette. The syringe has a blunt metal end and was intended for refilling bubble-jet printer ink cartridges. It is supplied by JR Inkjet. The pipette comes from the Scalextric Race Tuning Accessories Set. I use the syringe when I want to deliver a small amount of meths for cleaning track sections or motors. I could use the pipette, but I prefer the syringe. |
 |
 |
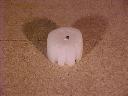
Model Railway Track Rubber. This is a well used track rubber as produced by Peco. For more details of how I use this see the Track Preparation section. |
Drill, Countersink and Counterbore. This is great at saving time as you only have to load it into the chuck once. Otherwise you would need to drill a hole, change drill bit, drill the clearance hole to the correct depth, change to a countersink bit and drill the countersink. You would need a specialist bit to drill the counterbore separately if you wanted. |
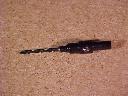 |
The bit is made up of 3 components. A normal drill bit is held in place with a grub screw so that the depth of the hole drilled can be adjusted for different screws. It also means I can replace just the drill bit (about 65 pence) when I break it on a hidden screw etc, instead of the whole thing. |
|
 |
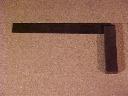
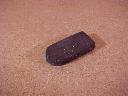
Guide Blade. This is a spare guide blade used to check how good track sections are. The guide blade is put into the slot and pushed along with one finger to test the resistance. If it binds or catches, the track rail has to be adjusted with a screwdriver etc or replaced with another. |
The guide blade has been modified by taking some of the plastic off the bottom to allow for the thickness of the braids which are not fitted (so that the blade can be pushed in either direction). Otherwise the guide blade will hit the bottom of the track even on a perfectly good track section. |
|
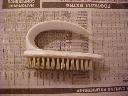
A Nailbrush. Used for cleaning and can be used wet or dry. The bristles go soft in water, so for a more aggressive action use cold water, but remember grease is best removed with hot water. A previous nailbrush completely disintegrated when used with engine degreaser. The plastic literally crumbled in small pieces and the bristles fell out. |
 |
 |
A Tape Measure. I kept on misplacing my tape measure, so I got another. Now I can keep one in the loft and the other in my toolbox downstairs for other jobs. I removed the belt clip because it got in the way and I prefer to put it in my pocket instead of on my belt, which is not even possible when wearing overalls. |
Remember not to let the tape spring back into the case when you have finished measuring. The 'hook' on the end should not be allowed to bang into the case or it will eventually come loose. It should be able to move the width of the hook so that the tape can be pushed into a surface or hooked over an edge and still give the correct measurement. Also try not to kink the tape as this will remove the slight curve which makes the tape more rigid. | |
Remember: Measure twice, cut once. It is usually worth marking something out, then measuring from the other end or in some other way just to confirm the measurement BEFORE you cut. |
|
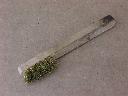
A Spark Plug Brush. This is a brush slightly bigger than a tooth brush with metal bristles. It is meant for cleaning spark plugs, but can also be used instead of a file card to remove soft materials such as plastics or lead from between the teeth of a file. Brush along the grooves for the best results. |
 |
 |
A Diamond Sharpening Stone. I think this is excellent, but it is the largest I can currently afford. It is better than the oil stones I have used. It is very quick at removing material and is fairly clean as water is used as the lubricant. I did not read the instructions and left it wet so it has gone rusty. |
Material can be removed quickest by rubbing the blade up and down the 'stone' (or moving the stone back and forth across the blade). The final sharpening should only be done by pushing the blade up the 'stone' maintaining the angle to raise a burr. The final step is to break off the burr on a leather strop (ideal), an old leather belt (cheaper but just as good) or your trouser leg if you are wearing old (strong) trousers. The Diamond Sharpening Stone works very well on pocket knives, small garden shears, scissors, bradles etc. |
|
I use emery paper glued to a mirror to sharpen blades that need to be flat such as chisels and plane irons, but this is another story, especially since I smashed the mirror a few weeks ago and therefore cannot photograph it. |
|
A 5 Pence Coin. This is the new size coin that is so small (smaller than a 1 pence coin) that I don't like carrying them around. So I put most in a pot except for this one that is used to open modelling paint pots. It has rounded edges so it doesn't damage the rim of the paint pot. |
|